I have been using our Ender 5 FDM 3D printer pretty heavily over the last year or so primarily for making miniatures for Dungeons & Dragons. D&D minis can cost anywhere between $5 – $50 or more, so the most cost effective way of having a lot of miniatures at your disposal is, well, build them yourself. This is especially true considering that there’s already an amazing 3D artist and D&D player who has spent the last several years creating 3D printable miniature models for all of the creatures in the core books — all I need to do is find his models (or join his Patreon) and print them.
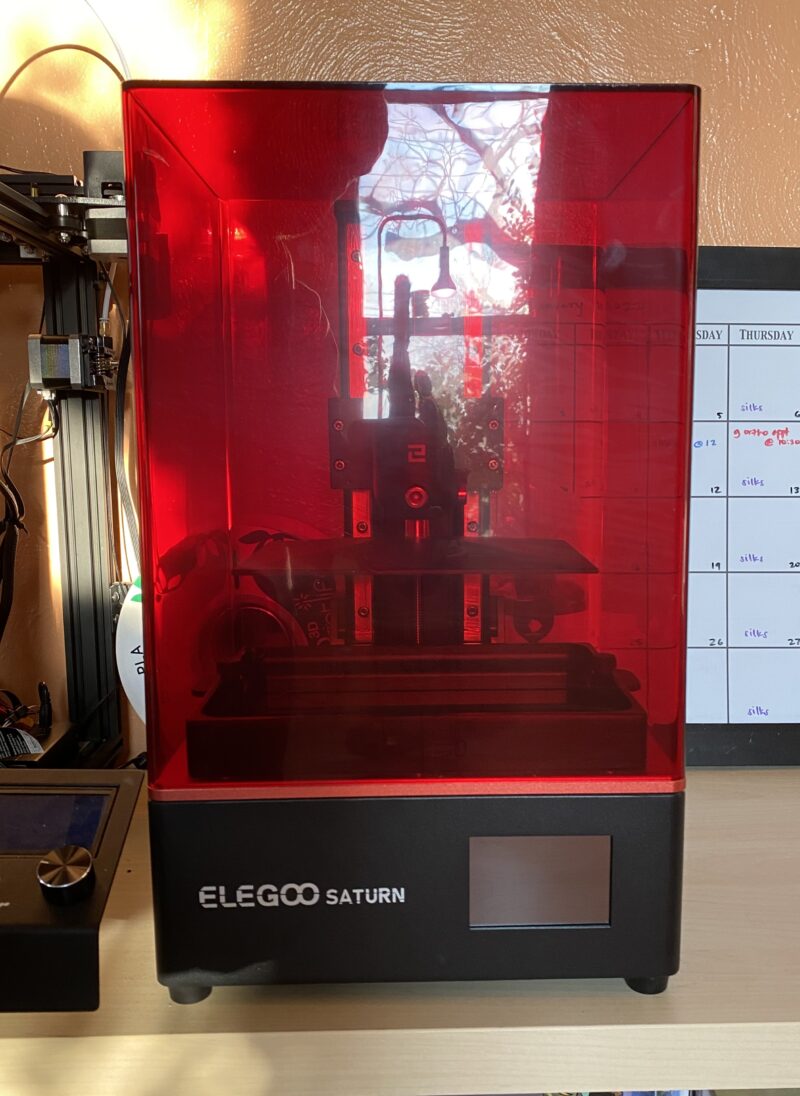
I have been pining for a resin printer for a long time because the print quality I have seen from resin printers is 1000x better than what I know I have been able to print most days. We recently got one (an Elegoo Saturn) and I felt like sharing some of our early experiments.
Resin printers work differently than FDM printers, and I’m really excited about the process. Resin/SLA printers use a UV-reactive resin that gets exposed to UV light inside the printer. Between the lights and the resin tray is an LCD screen. This screen displays an image of the cross-section of the current layer — sort of like if you took a top-down X-ray and then cut a slice out. The black areas of the screen block the light, so it only passes through the white areas, thus exposing the resin to UV light. It’s the same process that photographers will be familiar with, because it works exactly the same as an enlarger — the light travels through the (negative) image, exposing light on a photo-reactive surface — in this case, resin — to produce an image. Except in this case, the image is three dimensional. After the layer is exposed to light for a couple seconds, the buildplate arm that the model is being printed on (upside-down) moves up, allowing a new layer of resin to be exposed to the light.
Having taken photography classes and used darkroom techniques, when I learned that this is really what the magic is behind resin printers, I fell immediately in love. This is like everything I learned about photography stood on its head, and the process behind it feels much more natural than the FDM method of printing, which extrudes plastic like a hot glue gun, layer on layer, to build a model.
Typically, the first test print you do is this really cool rook model but since I will be printing D&D miniatures, I wanted to start there. I chose a specific creature that I needed in my current campaign, that I thought would look really cool in resin, and that I thought the Ender 5 would choke on or ruin with supports, a rug of smothering.
That print came out great. The base was a little warped (possibly just from my handling) and, not being used to how the cured resin behaves, I cracked part of it off trying to bend it back into place. Lesson learned. Still, it was extremely promising, which made it all the more heartbreaking and frustrating when our second print failed utterly.
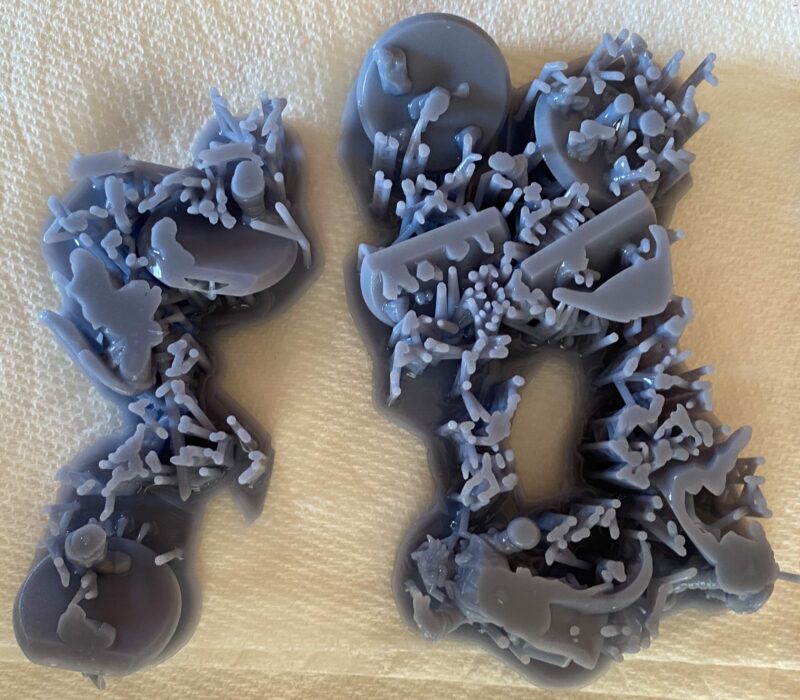
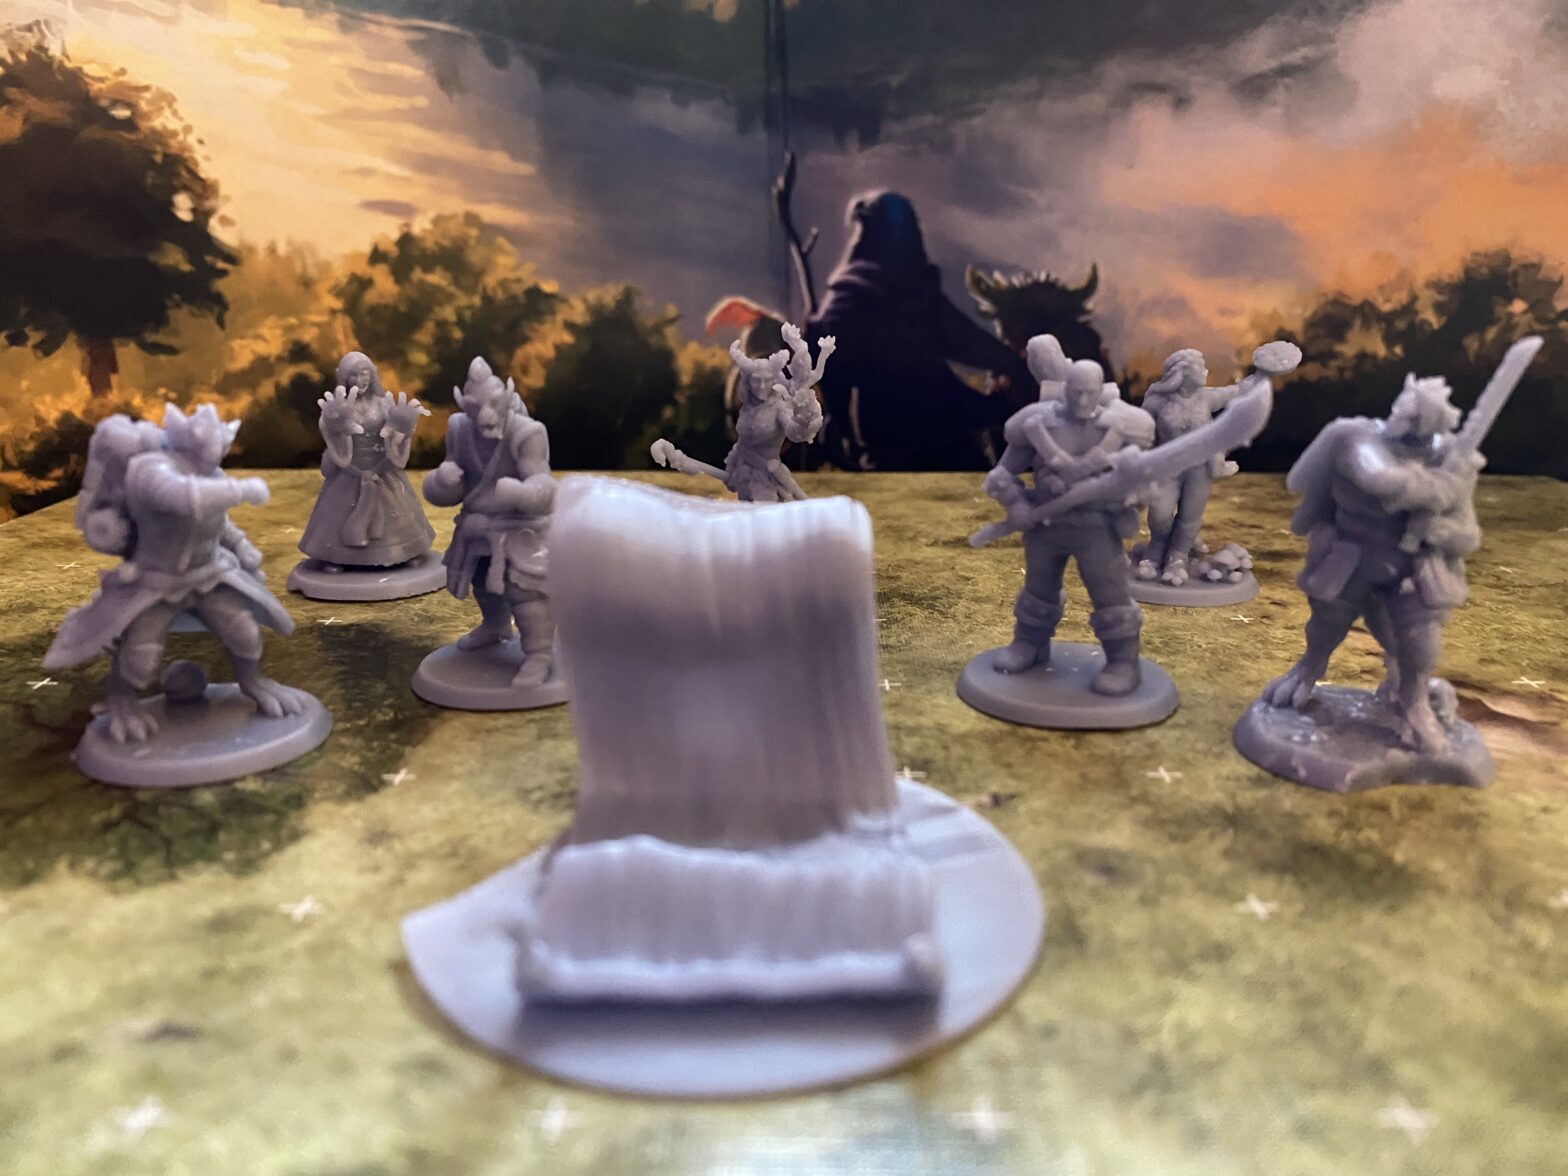
Seeing the success with that first print, and getting familiar with Lychee, I found that I could create a scene and print all my party’s Hero Forge minis in one go and not take any longer than it would if I printed a single mini (in stark contrast to FDM printing). After futzing with slicers, filetypes and trying (and failing) to send files over the network via ChituBox (the slicer recommended by Elegoo), I eventually got a ctb file that the printer liked and would try to print. It got about 50% of the way through the print before the build plate arm just stopped moving. I didn’t realize it hadn’t moved until it was done, so it was just exposing and curing resin until it completed with half of it just in one big mess at the bottom.
I contacted Elegoo support, and then I went through Amazon support (which connected me to their support, which ended up replying later than emailing them directly) with my first thought being “it’s broken or I broke it and I will need to return it and wait for a new one”. In the meantime, I did some research on the issue, saw some discouraging “I don’t know about these Elegoo printers” comments, as well as a lot of stuff about the lubricant they use in the factory hardening up and causing similar sorts of issues. I didn’t want to open it up until I was told to, so the next couple days were spent alternating between being really frustrated at the situation and being really disappointed and sad.
Finally, on Sunday night their weekend was over and they contacted me via email with some steps that basically amounted to re-lubricate the z-axis screw. I quick overnighted some lubricant so I’d have it in the morning and did that. When I was done, the build arm moved up and down again, so of course I started another print.
That one completed but nothing printed. It occurred to me that if the previous print didn’t finish, there might be some exposed resin at the bottom of the FEP tray (which holds the resin above the LCD screen) and, lo and behold, there was. So, I cleaned that off and started a new print. However, that one failed too, because the previous time when I tried to level the build plate, I had done it with the resin tray (with the cured resin at the bottom) still in place, so the second print failed because it never actually attached to the build plate. Drained, cleaned, reset the tray, & tried again, this time with success!
A few of the minis were so close together that removing the supports was super tricky and I lost a few in the process. But the rest looked amazing and took a fraction of how long they would take to build (and remove the supports) on the FDM printer.
That weekend was a crash course in resin printing considering the false starts and rollercoaster emotions but I’m very happy with the results I was able to get in the end. And considering it took months to figure out the right settings and configurations to use with the FDM printer, the learning curve (for me) has been much shallower.

I’m also extremely happy with my early decision to use plant-based resin from Anycubic. Besides being interested in plant-based resin for ecological reasons (and because we’re vegan, so plant-based anything just generally sounds good), it’s non-toxic, being made out of soy, which is a huge relief considering our youngest cat was very interested in what I was doing one night and jumped into my workspace when I was dealing with some prints and put her paw in some uncured resin.
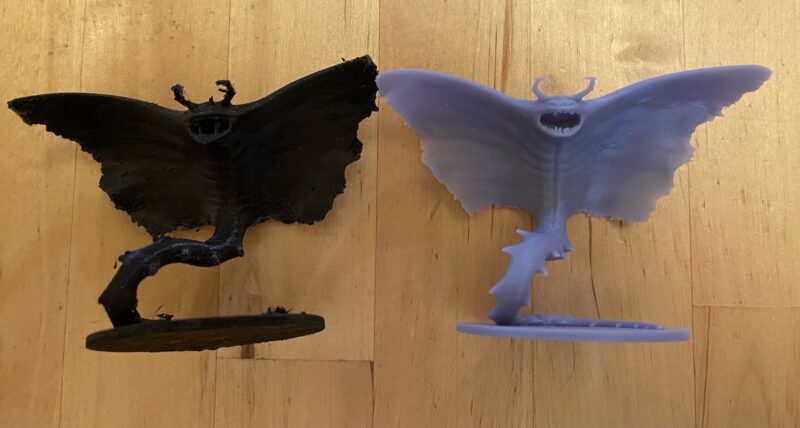
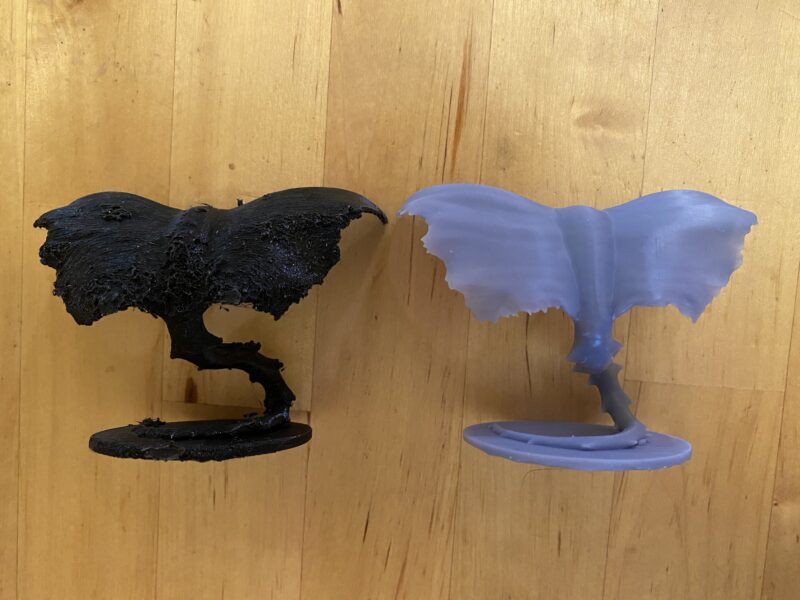
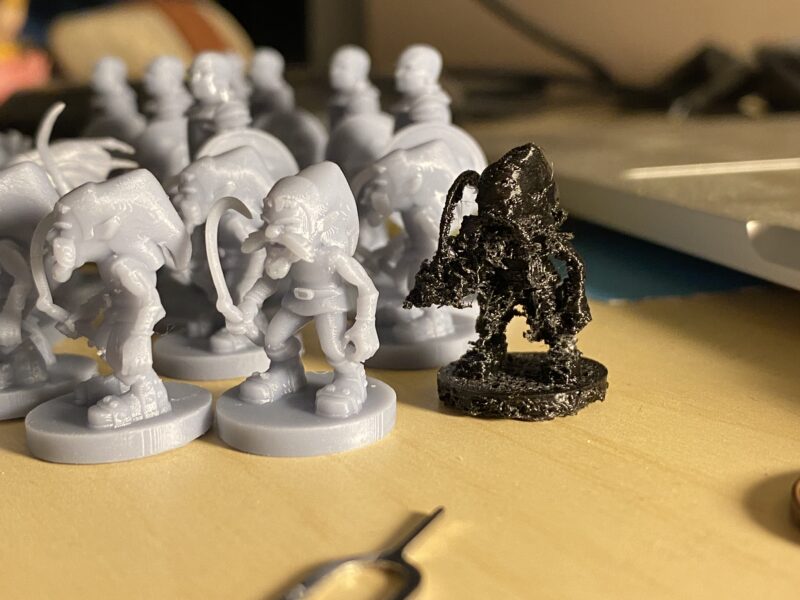
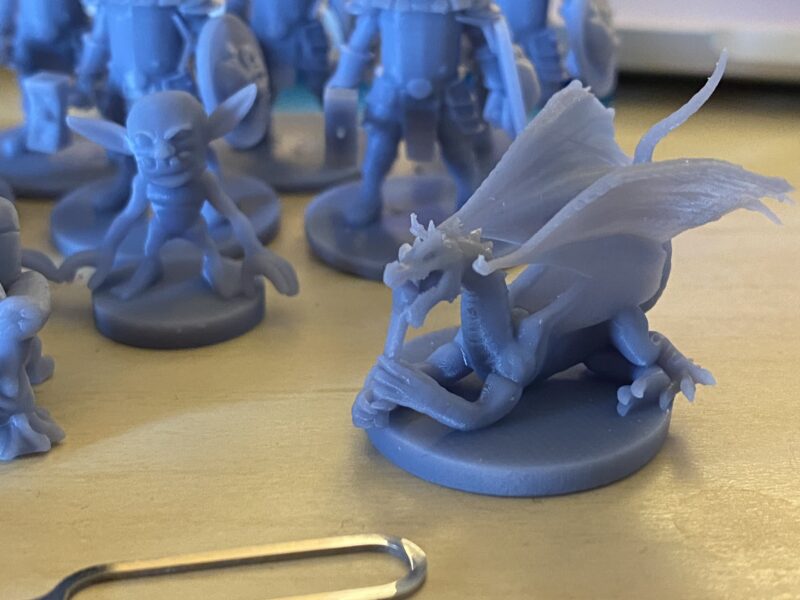
I’ve had some more time with the Saturn and I couldn’t be happier with the results we’re getting from it. The difference between FDM-printed D&D miniatures and resin-printed ones is vast. Even miniatures I thought looked really good at the time look chunky, flawed, or I notice the layers (or even gaps in the layers) more now than before in comparison to resin prints. And the difference in how long prints take is huge. Whereas with FDM prints you’re waiting for the extruder to push out every line, every layer, over and over and stacked on top of itself, resin exposes the full layer all at once. That means that if I wanted to print 8 copies of a specific miniature on an FDM printer, it would take me 8x as long, whereas if I do the same with a resin printer, it takes the same amount of time as it would take to print a single miniature, because it’s the same number of layers. This has led to me very quickly building a small army of foes for my players in a fraction of the time it would have taken to build them on the Ender 5, and the quality is not even close.
I still maintain that FDM printing is good for some things. It’s particularly great with support-less models or things that need a plastic that is a bit more sturdy and rigid. but given that that’s not what I typically need, I am thrilled to be able to get a session’s worth of miniatures printed and ready to go in a matter of hours rather than the days it’s taken with the FDM printer.
If you’re interested in resin printing, here are some YouTube videos that helped me a lot in understanding what I needed to know and the differences between resin and FDM printing:
- Is resin 3D printing worth it? (Elegoo Mars Review) – Thomas Sanladerer
- Getting Into Resin 3D Printing – The Ultimate SLA Beginners Guide – Nerdtronic
- Resin 3D Printing Safety – Important for Beginners! – Maker’s Muse
- Fix Elegoo Mars Binding or Stuck Z Axis – 3D Printing with Sam (this includes the steps for removing everything on the z-axis screw so you can re-lubricate it)
Leave a Reply